Friday, October 29, 2010
Wednesday, October 20, 2010
WEMS Halloween Carnival
Williams Elementary Halloween Carnival is Thursday October 28th from 5-7:30. I will have a booth set up to take pictures of your "little monsters." $5 for a 4x6 or $8 for a 5x7.
Shutter Speed
I have briefly mentioned aperture (and let Pioneer Woman's blog do the heavy explanation) so I will follow that outline in a brief discussion about shutter speed. And it just so happens I have the perfect examples from a trip to the ocean this last weekend. I didn't have my tripod available which I highly recommend for slower shutter speeds. More on that in a minute. If you are serious about taking your photography to the next level, it's very important to understand how your camera works. All cameras have a few things in common, but when you really learn your own make and model you will be more able to quickly change settings to get the look you are trying for. And understanding aperture and shutter speed and how they work together is key. There are lots of other settings to learn, but take your time on these, and experiment often, so when an opportunity presents itself to get a picture, you know how to change your settings quickly and get the shot.


So, shutter speed is pretty much what it sounds like. There are "shutters" that expose your sensor (on a digital camera) to light to make the "exposure" or picture. Fast shutter speeds freeze action. They capture droplets of water as they fly through the air.

Slow shutter speeds give a sense of motion. Motion blur, and this effect is especially interesting when the subject is water. As I mentioned, the shutter will be open for longer. Up to a full second if necessary so using a tripod will vastly improve these images, making the stationary objects sharp, while the water takes on a silky, smooth appearance. I did not have a tripod available when I took this shot so it is still possible to get this look while hand holding your camera, but the image may or may not look good when enlarged. (This one doesn't, but as a 5x7 it would look fine.)

Most camera's have aperture priority (A mode) and shutter priority (S mode) as options, and these will help you explore these concepts without having to figure out manual setting (M mode) for now. And to further explain here is another link: http://thepioneerwoman.com/photography/2008/10/exposure-illustrated/
Labels:
motion blur,
ocean,
shutter speed,
tutorial
Tuesday, October 12, 2010
Background for a Portrait

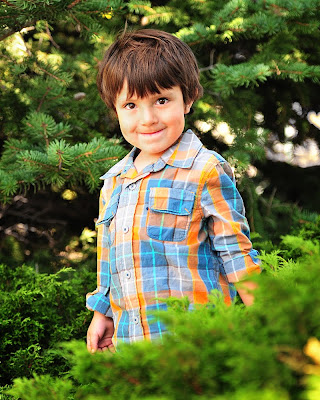
I am going to post something easy and straightforward today. When taking a portrait, look for simple backgrounds. Somewhere with very little going on. You want the focus to be on your subject. Find a blank space of wall, a fence, foliage that is fairly uniform or hang something to hide distractions in the background. A brightly colored sheet will work for children. A soft blanket will work well with a baby. Even out and about, if you simply look around for the least cluttered spot, you can place your subject in front and snap away. You may not have the blurring capability that the high end cameras and lenses have, but see what you can do with your own camera. Even a little blur looks nicer than everything in focus, which is common with auto settings. Read your camera's manual and figure out how to set it at the lowest aperture. This will help blur the background. Here are a few links to expand on todays topics, from a photographer who inspires me. More about backgrounds: (beware, this photographer has a lens with mega blurring capability) http://thepioneerwoman.com/photography/2010/10/backgrounds/
More about aperture: http://thepioneerwoman.com/photography/2008/05/what-the-heck-is-an-aperture-part-one/
She has about four different parts to the aperture info, check them out if this stuff interests you.
Wednesday, October 6, 2010
Subscribe to:
Posts (Atom)


