man cave

Wednesday, September 29, 2010

Light


I am a little uneasy about getting into lighting as a "simple" tutorial. But there are definitely a few tips that you can try (with any camera) that will yield nice results. You have probably taken a picture before that just looked great, and you weren't sure why you couldn't duplicate it. Well, photography is all about light. And most folks take pictures because something is going on that is cute or funny or of people they haven't seen, but they don't consider the effect of light on the subject. But when you consider the light, you will see vastly better results. The simplest of "tricks" is to place your subject in open shade. To achieve what I am talking about here, you will need to find an outdoor space without direct light. Say on the shady side of your house, under a tree (as long as the shade is constant, no dappled light) or anywhere on an overcast day! Make sure you turn off your flash because flash can ruin this light. Then as discussed previously, find the best angle. Take pictures from lots of viewpoints. The background of your photo is also important. If you are under the shade of a tree, the brightly lit background can cause you grief. If you are including lots of background, your camera will expose for the overall scene and will underexpose the shaded subject. The shady side of a house is good, because your whole scene will be in the same light, meaning the exposure will be right on for anything in the picture (assuming you are using the shaded wall as a background.) I feel as though I am getting farther in than I wanted to. Does any of this make sense? I will explore this subject of light further, but for now try this and let me know what you think of the results. Happy experimenting! (One further note: My camera equipment is very costly, and gives me the ability to shoot in much lower light with sharper results than the average point and shoot camera. Don't get discouraged because your pictures don't look like my average post. I also spend lots of time post processing my pictures to further enhance them. But practicing these tips will help, and you can take great photos with any camera when you take the time to practice what you have learned. Good luck and enjoy your progress. Have you already noticed an improvement? I would love to hear about it.)
Sunday, September 26, 2010

Senior Pictures


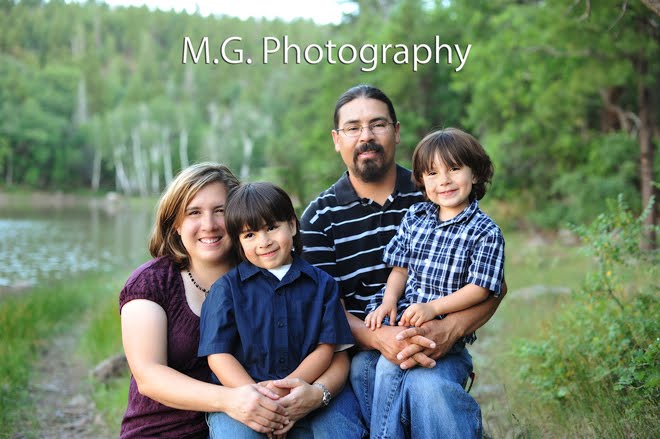
Here's a little sneak peak for Amber and her family. I enjoyed our session and hope you are as pleased with the results as I am. Lots more are in the works!

Wednesday, September 22, 2010

Composition II

I wanted to mention a few more things about composition, so here is your next installment. I have a "secret." I don't whip out my camera and take one great looking photo. I take lots of photos and pick the best one (or ones) to present. The more you take, and the more you objectively study your pictures, the more you will notice what "works" and what doesn't. I like to work a subject by taking lots of pictures from lots of angles and close up, far away, the whole gamut. As you do this, you gain experience in what "works" and you get faster at knowing which ones will turn out. For example, getting down to a child's level almost always works better than standing and looking down at them. Today I had the chance to take a lot of angles of a subject that usually moves too much to make this point.

These angles all work for me, although in this group my favorite is the one on the far right. His arm creates a diagonal line that leads the eye straight to his adorable, sleeping, little face.


These are a few I wasn't as fond of. The bird's eye view is not all that dynamic, but I like that you can see his whole body, and the weird position he fell asleep in. The other one makes his arm and hand look shrunken and kind of scary.

And here are a couple more that I liked, just to show how many I actually take. (By the way the actual number I took for this little experiment was 36, but you get the idea, I ended with far less to show.) I read lots of different blogs and here is another simple little article on the same subject: http://cameradojo.com/2010/08/08/another-take-on-perspective/ While you are over there, he has one more titled : Use a simple angle to make a shot more dramatic. Enjoy.

Monday, September 20, 2010

Composition

I want to try something a little different today. Lots of you are trying to take better pictures, and are interested in photography (since you are reading this.) So I am going to do a few tutorial style posts to give you an idea of some of the things that go through my mind when I click the shutter. With any kind of camera (including your phone camera!) you can take better pictures by choosing your composition. What do I mean by this? Well, what is it that you are taking a picture of? In my case it's often a kid. If it's only a kid I will get in close and fill the frame with them. It might be the expression on their face. If I want a picture of what they are doing, I will include some of the background, but beware, very little of the background is needed to provide context. Next, how am I going to position them within the frame? Oftentimes dead center does not provide for the most interesting picture. Off center and specifically, using the rule of thirds, often works well. What is the rule of thirds? Imagine your rectangle frame and cut it into thirds. (Please excuse my extremely primitive "drawing" here.)
In the example the subject is centered and although an ok picture, it is not as dynamic as the next picture which puts the subject approximately one third of the way into the frame. Especially her eyes (the most important part of the face) are positioned one third of the way from the top of the frame.
I will include a few more comparison's for you and then I want you to try and the rule of thirds for yourself. If you are taking a close up, the eyes naturally fall in approximately the top third of the face, convenient eh?

Wednesday, September 15, 2010

Knight in Shining Armor


This is kind of random. But my friends' son loves dressing up in whatever he can find to be a superhero. He has been Indiana Jones, Wolverine and Edward Cullen. And on our last visit he was a Knight (in shining football armor.) It's great that he is so willing to be one of our subjects while dressed out for battle. I had fun playing with these pictures to get a sort of antique look.

Tuesday, September 14, 2010

Bath time


My best friend is also my mentor. She is the one who started me on my journey into photography. This shot is so much like one of hers, it's hard to believe I took it. So I just want to tell her, thanks so much for everything you do for me. You are my inspiration.

Friday, September 10, 2010

Suprise!


In order to update this more often I have set the goal to post at least one picture per week. My standards are kind of low, but I am hoping that such a small feat will make me more likely to stay committed. I'm on another short vacation at my BFFs and I usually take lots of pictures, so here is one from today that makes me smile. This is his "What?" face.

Wednesday, September 1, 2010

Favorite Boots


My youngest son loves these boots. He forgot them though on his latest camping trip with Dad. I love how the mid-morning sun was falling on them sitting all lonely in the bathroom.